One of our retail locations had a 2015 Ram Promaster show up on the back of a tow truck a few weeks ago, and this truck is a service vehicle for a local grocery store. The driver said he was traveling at about 40MPH when he felt like he ran over a boulder in the road, heard loud noises, and the truck stopped moving. This is the first time that I have seen this happen; the transmission was hanging down so far it was almost on the ground. What the heck happened?
We carefully pushed it into the shop so we could try to raise the transmission up and secure it so no more damage could occur, it almost appeared that the heater hoses were the only thing holding it up as they were stretched tight. After we were able to get the transmission lifted up and secured with a chain we were then able to see what happened, the left transmission (Chrysler calls it an engine mount) mount bracket and the transmission case were broken. There was a lot of damage done: case broken, mount bracket broken, both axles were damaged, shift cable broken, and air intake tube was torn. What we did not know yet is what caused this to happen. These photos were taken before we removed the transmission.
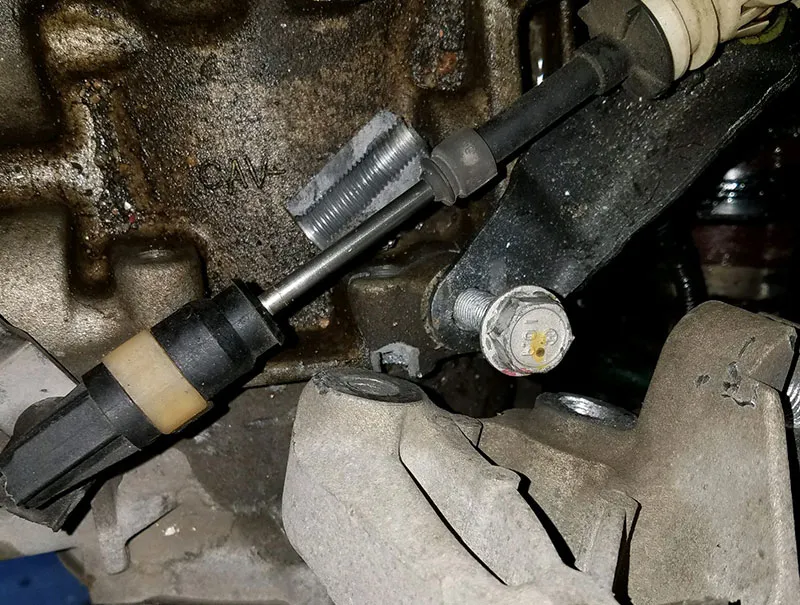
Figure 1
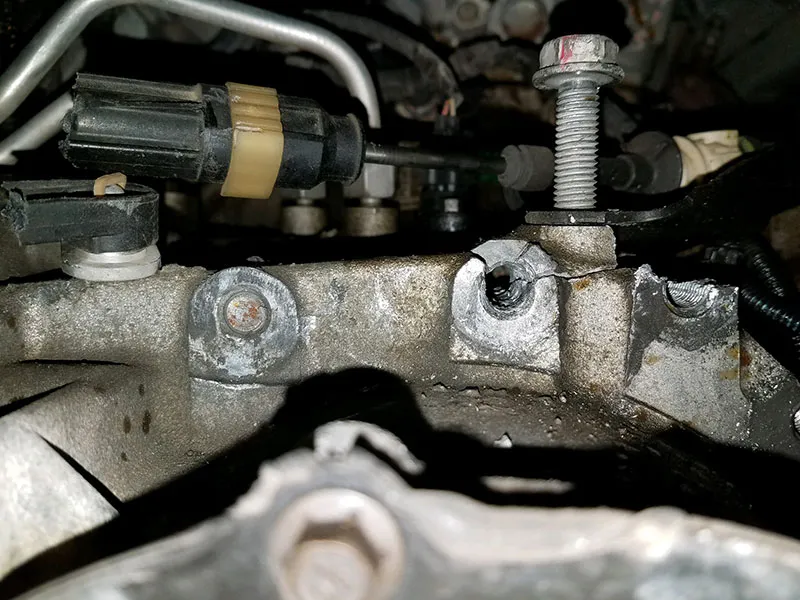
Figure 2
If this vehicle was traveling down the highway I'm sure it could have been much worse. There were wire looms that were at the verge of possible damage if it had dropped any further. We needed to find out why this happened and take the appropriate steps to make sure that it did not happen again. In a situation like this, if the root cause isn't discovered there is a high probability of a customer comeback and another damaged transmission case.
We first looked for TSBs and came up empty, so I then contacted our technical director that is in charge of this unit model at our remanufacturing facility and asked if we were seeing cores come in that were broken like this. Sure enough we were, and he also informed me that the case for this particular application was just recently made available for sale from FCA. It was pretty clear that this was more of an issue than what I was initially aware of.
The next step I took was to call our local FCA dealer to check parts availability as I just wanted to make sure that everything was available to fix this vehicle before I turned this over for the service advisor to sell the job. This is where having a good parts professional to go to is always a good thing! After I gave him the VIN number and the parts that I needed, he said, "Hold on there are some notes on this one." He then provided me with the paragraph below:
ALSO: This applies all Promaster (VF) 3.6L/62TE equipped vehicles. If the transmission bracket to the transmission case fasteners is removed during servicing, the fasteners (Part Number 06511385AA) are one time usage, and must be replaced. Vehicles built prior to 10/23/2015 require Service Kit PN 68461214AA; includes Transmission Isolator PN 68264483AA, and Adaptation Bracket 68264479AA, Fastener Service Kit PN 68329056AA. Vehicles built after on or after 10/23/2015 will require only the Fastener Service Kit PN 68329056AA (Please note that part #'s are subject to change, please check with your parts supplier) The production date on the vehicle we were working on was before 10/23/2015, so according to the notice we knew that we needed the complete service package.
With this newfound knowledge in mind, I was fairly confident that we could install a remanufactured transmission along with the updated parts and not have this issue after we completed the repairs. What I didn't know at this point is exactly what was changed with the new bracket, isolator, and bolts.
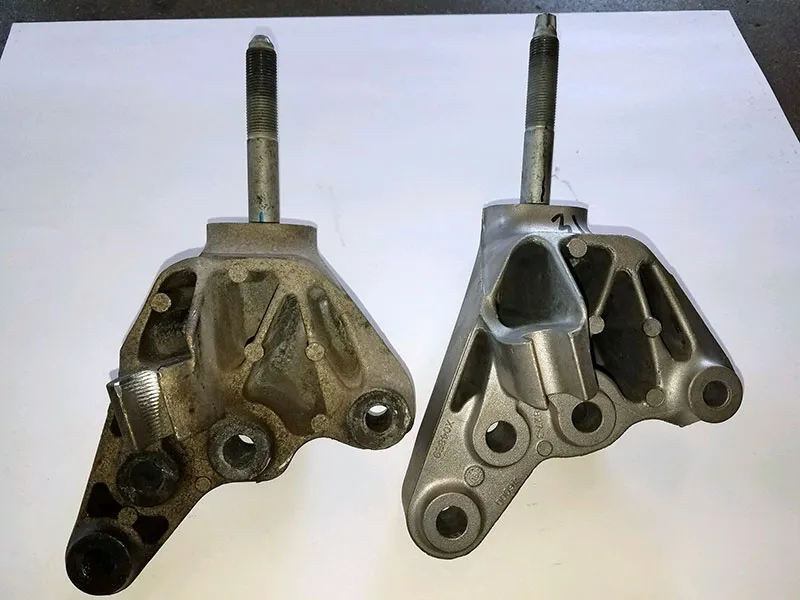
Figure 3
This is the updated bracket compared to the OE piece, and it's hard to tell from the picture but the new one had a lot more mass to it.
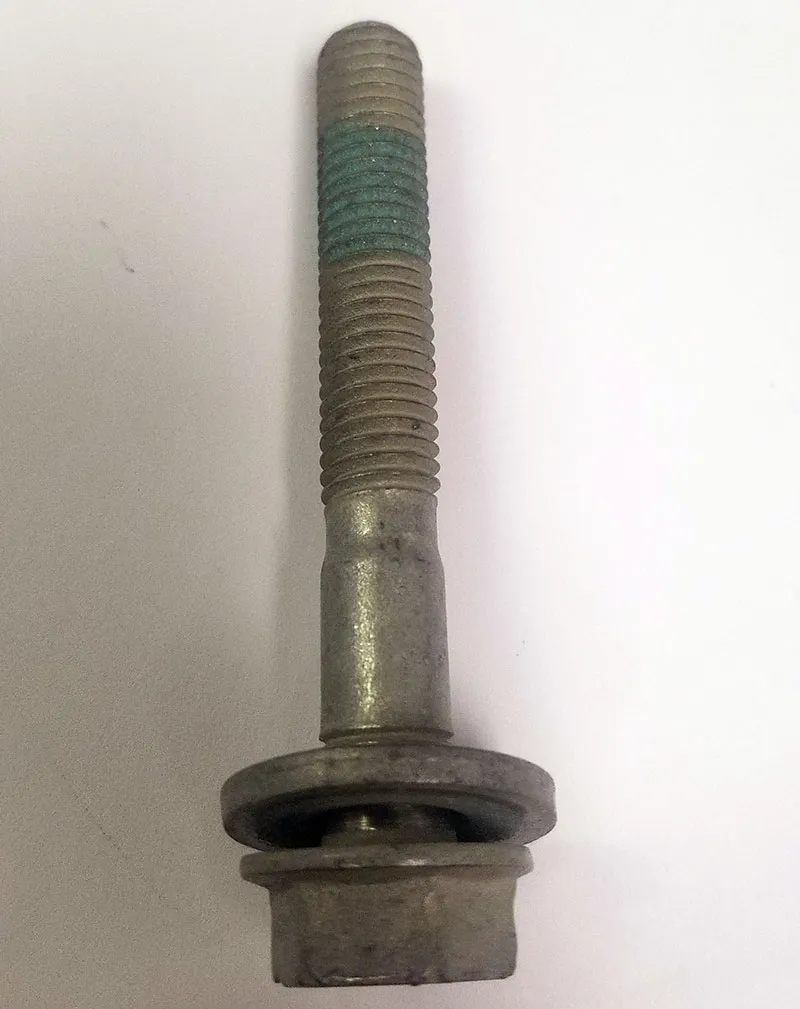
Figure 4
This is one of the new side bolts which are longer, have threadlocker compound on it, and even have some type of lubricant between the washer and head of bolt which I presume is for a more accurate torque reading. You will also need to remove the left headlight to properly torque the top mount bolt.
Please refer to service information for the complete procedure to install the mount, but I will cover the highlights here:
Note: Mopar? lock & seal adhesive must be used on mount fasteners to prevent vibration loosening.
- Hand start all five transmission bracket bolts, starting with the lower four and then the upper bolt.
- Using four NEW bolts, beginning with the two outer, tighten all four side bolts to 77 ft-lbs.
- Tighten upper transmission bracket bolt to 46 ft-lbs.
I believe that if you were to tighten the top bolt before the side bolts, this would create undue stress on the case and bracket.
What I believe causes this issue is the mount bracket bolts coming loose; it is really hard to come to a 100% conclusion when they come in all broken apart like this but I can see evidence of movement of the bracket. In these photos you can see some wear on the boss that mates with the case, and there are thread grooves cut into the aluminum from the bolts which I would only think would be possible with movement of the bracket.
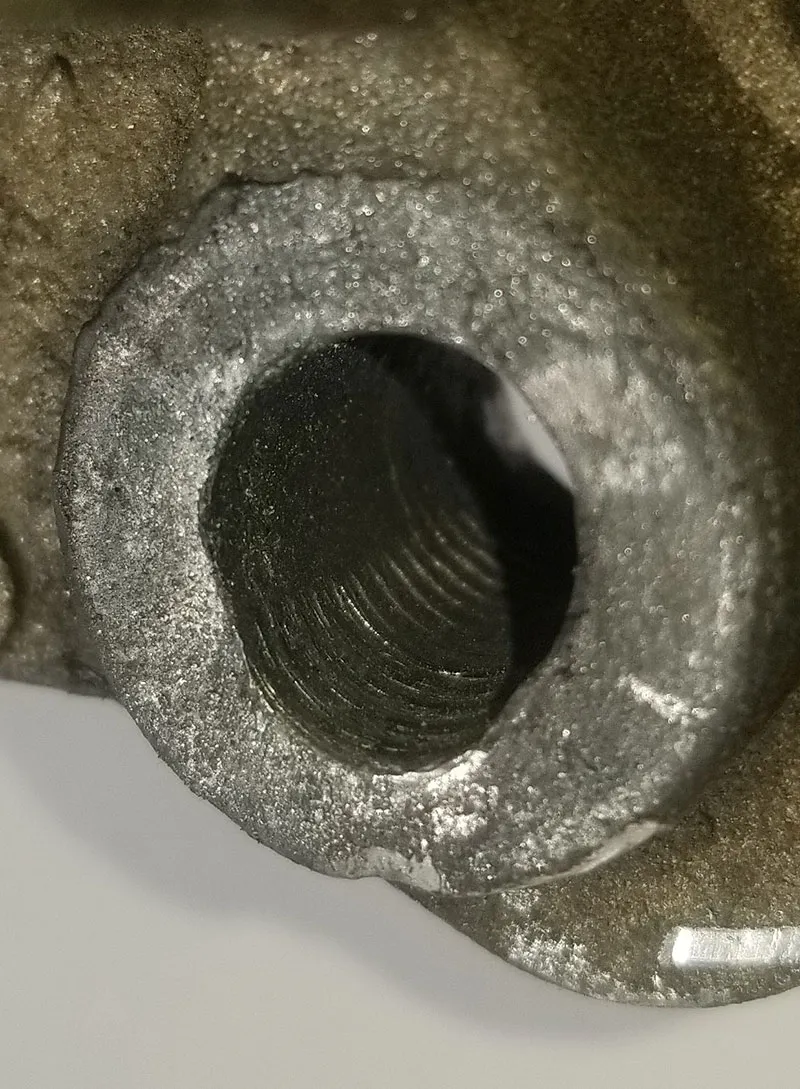
Figure 5
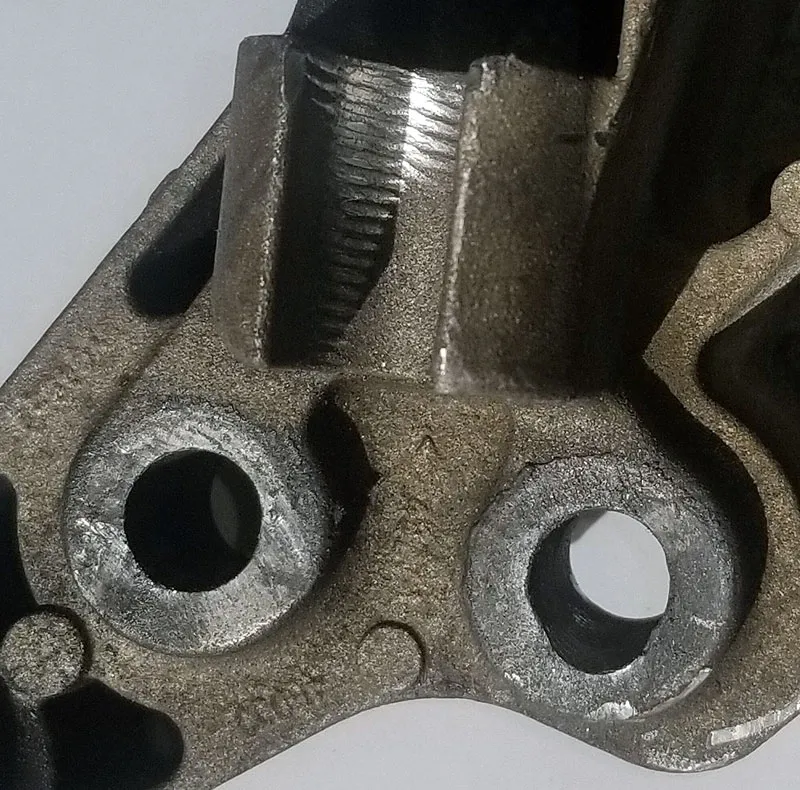
Figure 6
 Certified Transmission
